Articles

Indian Institute Of Photography

IIP offers a free weekly newsletter with:

1. New photography tutorials and tips
2. Latest photography assignments
3. Photo competitions and prizes


Enter your email below to subscribe.

Know The Basic Elements Of Your Digital Camera

What is the first feeling, when you buy a camera? For most people, it is to quickly learn the basic elements, so that they can start using their latest buy effectively. All cameras are provided with user manuals, but they lack in two things:
1) It provides the information, which can help to use the camera and not about the camera itself.
2) It does not categories the information based on its use. So, you will get all the

information, but probably, you also have to go through unwanted information to know about it. Here we present some basic and most useful elements of the camera (DSLR or point-n-shoot), which every user should know.

The basic elements of your Digital Camera

A camera is divided into two parts:

  • Hardware : The physical elements of the camera
  • Software: Different modes or options, which can control the physical elements of the camera. Aesthetic view (do not worry much, if you do not know what this is) and overall quality of the final image.

Let us talk about what constitute Hardware and Software:
Hardware:

  • Viewfinder: It helps you to look at the scene/object you want to click. You can look directly through the viewfinder eye-piece or on the LCD screen before clicking a picture.
  • Lens: Lens is a combination of different glass elements (concave and convex) arranged in multiple groups and helps to project your scene/object inside the camera to capture it. The light rays enter into Camera through the lens.

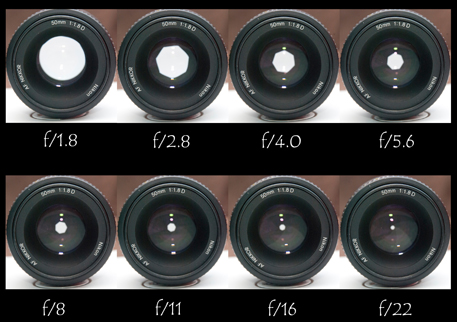
  • Aperture: Aperture is the hole or circular diaphragm (not visible from outside) within the lens. We cannot change the lens elements, but we can change the size of this circular diaphragm to decide, how much light we want to allow in. It is represented by F-number. A lower F-number means larger hole and more light inside the camera.
  • Mirror/Shutter: After light passes through the lens, it falls on a mirror, which reflects it to the viewfinder, so that the viewer (that is you) can see the actual image to be captured. When we click the image, this mirror goes up and the same light falls on the sensor to capture the image. Now, we can decide the speed of this mirror movement using programs (explained in the next section). It is represented on time scale (in seconds), the more the time, the slower the movement of this mirror and the more light can fall on the sensor and vice versa.
  • Focal length: Focal length is the distance between the center of the lens to the plane where the image is created. It is measured in millimeters (mm). In layman terms, focal length controls the angle of view, i.e., compared to human eye; it can show the same view, broader view or a narrower view. It helps in controlling the area we want to cover in the image. We can take wide angle photo of a landscape at a smaller focal length (say 18mm), a normal photo of a portrait at 50mm (human eye view) and telephoto of a distant animal at a larger focal length (say 300mm).
  • Sensor: It is the heart of the camera. It converts lights rays into electrical signals for further processing inside the camera. It contains the pixels of three primary colors, which are Red, Blue and Green. When light falls on these pixel, the electrical signal corresponding to the correct combination of colors (according to the scene) is generated. The more the pixels on the sensor, the better details we get in an image. That is why, people run behind mega pixels. Although, for the purpose of viewing on the computer/laptop/mobile screen and for printing 8'X10' (or below) you do not need more than 5 Mega Pixels (MP) to 6 MP. Still, since people are mad about it, camera companies are cashing on it. We can also change the sensitivity of the censor by changing the ISO values. But, higher ISO values results in noise, so it must be optimally used.


Software

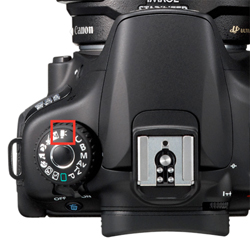
  • Automatic mode: Camera takes the full control here. It just decides the value of aperture, shutter, ISO, etc, based on its internal algorithm and captures the image.

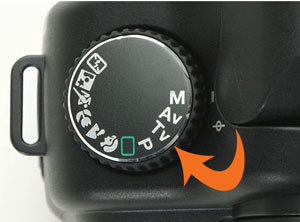
  • Program mode (P): It gives you some flexibility, such as choosing your ISO value, White Balance(WB) and flash control. Camera decides rest of the parameters, especially, the aperture and the shutter speed.

  • Aperture Priority mode (Av): Now, we are talking of more manual controls. In this mode, we can also choose your aperture value along with all the parameters of Program mode. Camera only decides the shutter speed automatically. We use this mode generally when we are shooting a still object, such as a portrait or landscape.

  • Shutter Priority mode (Tv) : In this mode, we can control shutter (along with the parameters in the Program mode). Camera decides the aperture value. We use this mode, when we are shooting a moving object or when the light levels are too low(to be controlled by aperture or ISO).

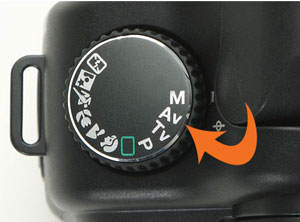
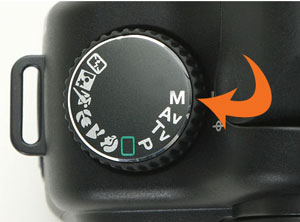
  • Manual mode(M): This is full manual mode. Camera transfers its intelligence to you and allows you to change all the possible parameters in the camera. So, you can have full control on ISO, WB, flash, aperture and shutter. This is full manual mode. Camera transfers its intelligence to you and allows you to change all the possible parameters in the camera. So, you can have full control on ISO, WB, flash, aperture and shutter.


Now, we will talk about some automatic software modes (no manual control) for specific purposes in the digital camera:

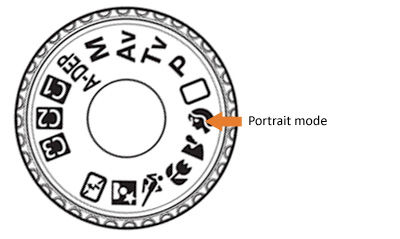
  • Portrait mode: This helps in taking pleasing portraits. Camera assumes that the object is within few feets of the distance and selects low aperture values (big aperture) to give blur background. This highlights the person/object in the scene against the background.

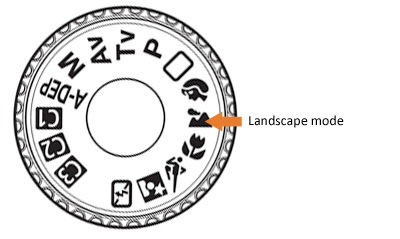
  • Landscape mode: This is useful in nature photography, when you are shooting outside. The typical scenes can be sea beaches, mountains, sunsets, etc. The camera selects higher aperture values to increase the depth of field.

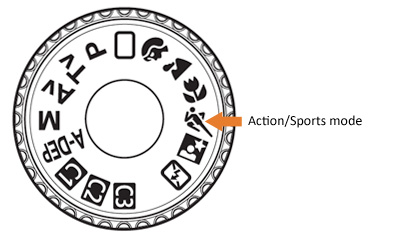
  • Action/Sports mode: This mode is used for shooting moving objects, such as sports person, wildlife, cars, etc. Camera selects higher shutter speeds to ensure everything is sharp in the image.

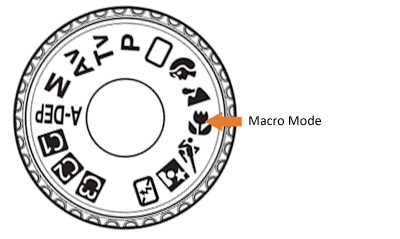
  • Macro Mode: This mode is useful to capture small objects from close distance. The sample objects can be an Ant (or other small insects), Flowers (if you want to fill the frame with single flower) or letter written in the book. This mode is dependent on the minimum focusing distance of the camera, which is generally between 0 cm (some camera claims 0 cm also) to 10 cm.

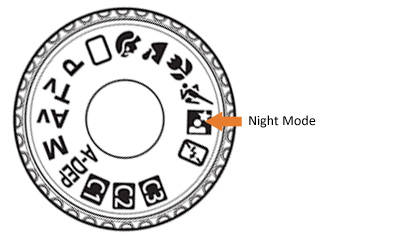
  • Night Mode: This mode is useful in low levels of light, such as in night, late evening, inside home, etc. Camera selects lower shutter speed and higher ISO values to take a sharp picture. When using this mode, it is advisable to use tripod or put camera on a stable base (instead of keeping in hand) to get the best results.

  • Movie Mode: This mode helps in capturing the movie instead of an image. Short movies of few minutes can be very interesting sometimes, as it helps to capture real action.

The above information can give you fair idea about the basic elements of the camera. However, these are only basic elements and there is much more inside your camera. I am sure, curious readers will become anxious to know more about photography.
Join 3 Months Online Foundation Photography Course